Build Your Own Wallet
Now that you explored our Prebuilt Wallet APIs, it's time to put these into action. This document outlines how you would build your wallet application from scratch!
Step 1: Setting up your development environment, researching, and deciding on the front end.
This project assumes you have some background knowledge and know the basics: from installing Web3.js and other necessary libraries.
To build your wallet, you’ll also need to decide on your product’s features and how they should look and feel for the end users. There are many front-end courses and videos that can help you get started with this part of the project:
- Intro to Frontend Web3 Development by Chainlink
- Blockchain, Solidity, and Full Stack Web3 Development with JavaScript.
Step 2: Setting Up Blockchain Connection
You’ll need to connect to the Ethereum Network (or any other EVM chain). Using any RPC provider service to connect.
An RPC connection is required in order to read as well as write data from and to the blockchain.
- Reading data:
Reading a value from a contract, what the current gas price is, or the balance of a user or a contract. - Writing data:
Transferring funds from wallet to wallet.
Interacting with smart contracts such as DeFi Lending/Borrowing or purchasing tokens or NFTs.
Step 3: Reading Blockchain Data with ZettaBlock
Integrating ZettaBlock for reading blockchain data offers significant advantages over traditional RPC calls, especially in terms of efficiency, speed, and cost-effectiveness.
Here's how ZettaBlock enhances the process:
Real-Time Balance Updates
- Instant Reflection: ZettaBlock enables the immediate display of updated balances after transactions. This responsiveness is crucial for user satisfaction, as it allows them to see the changes in their wallet as soon as a transaction is executed.
Efficient Data Fetching
- GraphQL Queries: Instead of multiple read calls to an RPC node and caching the data, ZettaBlock uses GraphQL. This means wallets can make a single query to fetch all corresponding balances for a user, significantly reducing loading times and costs.
Combined Data Requests
- Token Prices in One Call: Users are often interested in the current value of their tokens. Traditional methods require multiple calls to price providers and client-side calculations to determine the dollar value of these tokens.
- ZettaBlock’s Simplified Approach: With ZettaBlock, both balance and price information can be obtained in a single GraphQL query. This unified approach not only saves time but also streamlines the data retrieval process.
Step 4: Prebuilt APIs for Real-Time Balances and Prices
To run all these GraphQL endpoints, go here.
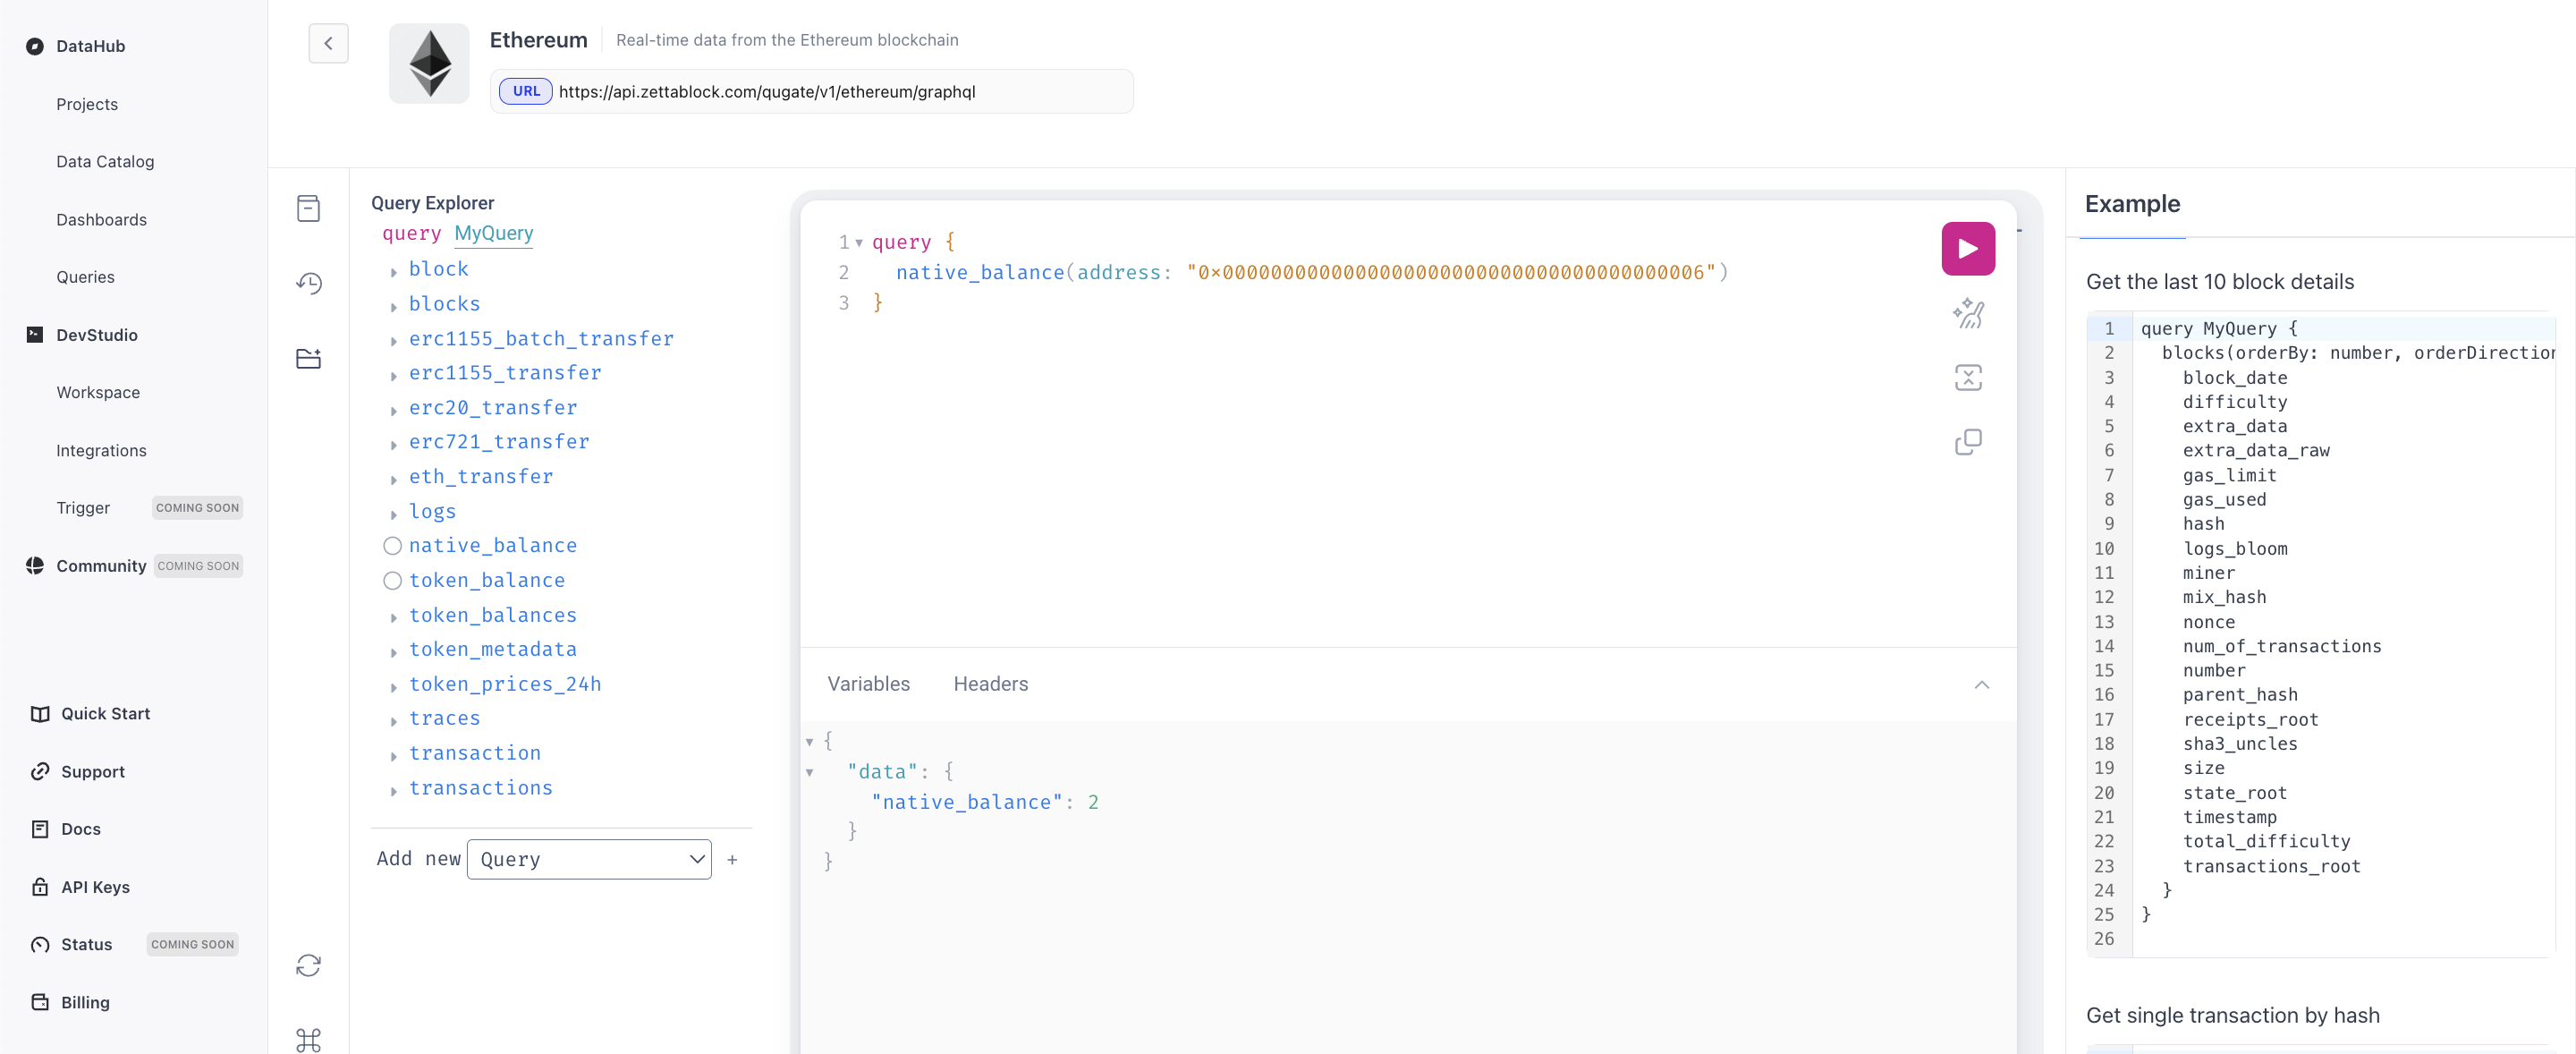
To fetch the latest user balance:
query {
  native_balance(address: "0x0000000000000000000000000000000000000006")
}
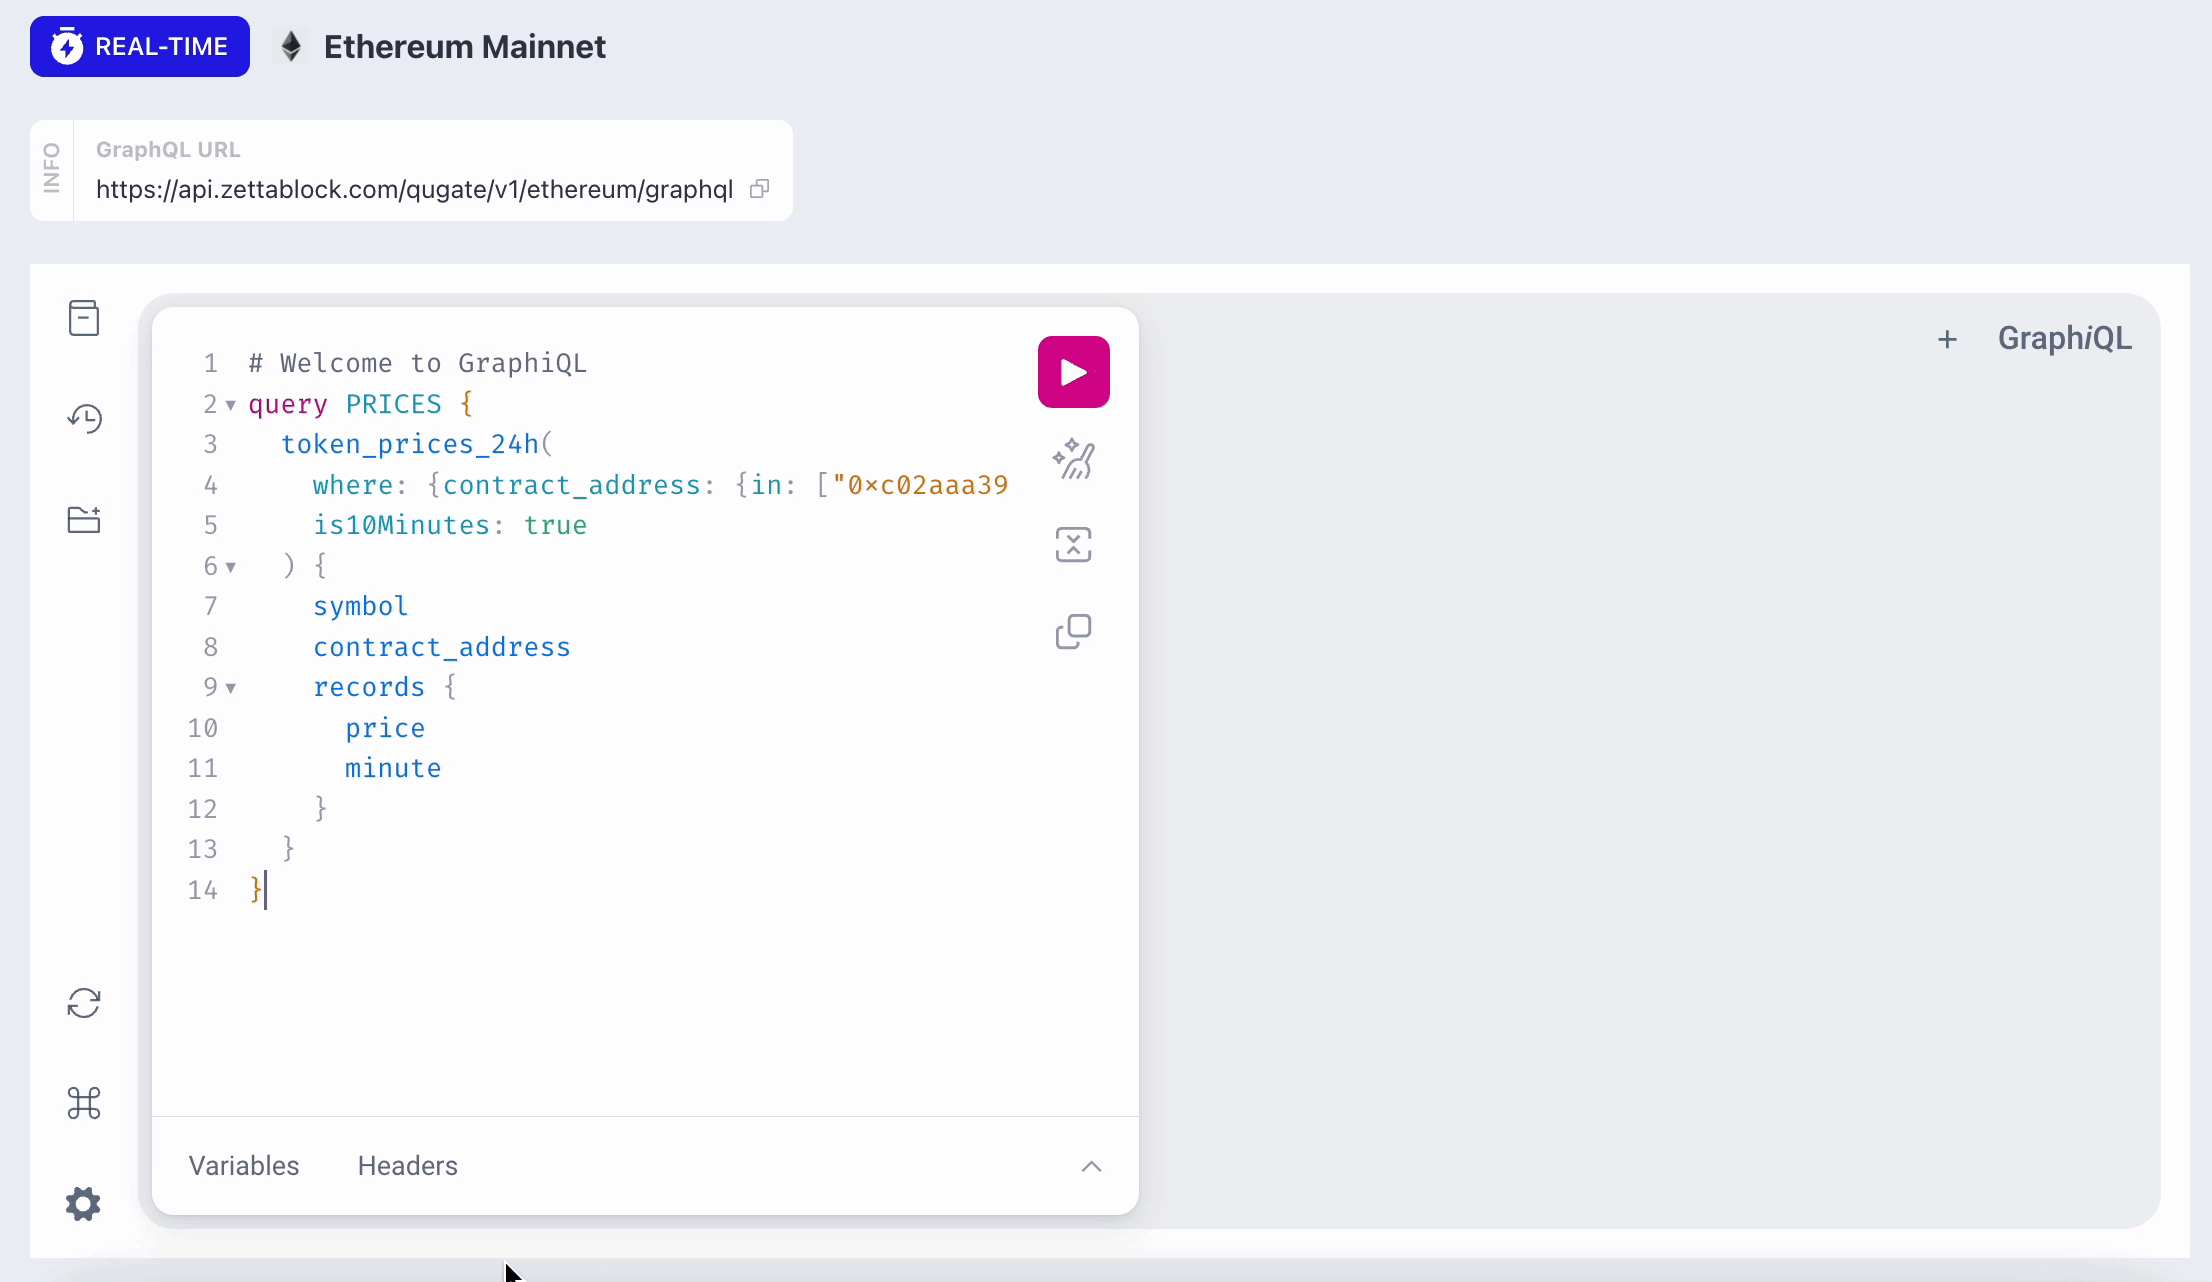
To fetch the real-time token price data for the last 24h hours:
query Prices {
  token_prices_24h(
    where: {contract_address: {in: ["0xc02aaa39b223fe8d0a0e5c4f27ead9083c756cc2", "0x9be89d2a4cd102d8fecc6bf9da793be995c22541"]}}
    is10Minutes: true
  ) {
    contract_address
    records {
      price
      date_time
    }
  }
}
How to call the API?
- Get the GraphQL URL from the playground.
- Get your API Key.
- Call the API.
Example: call API from CLI
curl --request POST \
     --url https://api.zettablock.com/api/v1/dataset/sq_f5abb78bafe94f00be4b00f9da8449e1/graphql \
     --header 'X-API-KEY: [YOUR API KEY]' \
     --header 'accept: application/json' \
     --header 'content-type: application/json' \
     --data '
{
  "query": "{   records(limit: 300) {     created_at     token_1     token_2     pair_address     swap_amount     swap_count   } }"
}
'
Step 5: Putting it All Together & Integrating Frontend
- Create Frontend Files: HTML, CSS, and JavaScript files for UI.
- Use Web3.js in Frontend: For interacting with Ethereum from the browser.
- Form Handling: Capture user inputs for sending transactions.
- Display Wallet Info: Show account balance, correlating $price and transaction history.
Step 6: Testing
6.1 Unit Testing
Write tests for individual functions and components.
Use testing frameworks like Mocha or Jest.
6.2 Integration Testing
Ensure that different parts of the application work together seamlessly.
6.3 End-to-End Testing
Simulate user interactions with tools like Cypress or Selenium.
Test the complete flow of transactions and data fetching.
Updated 10 months ago